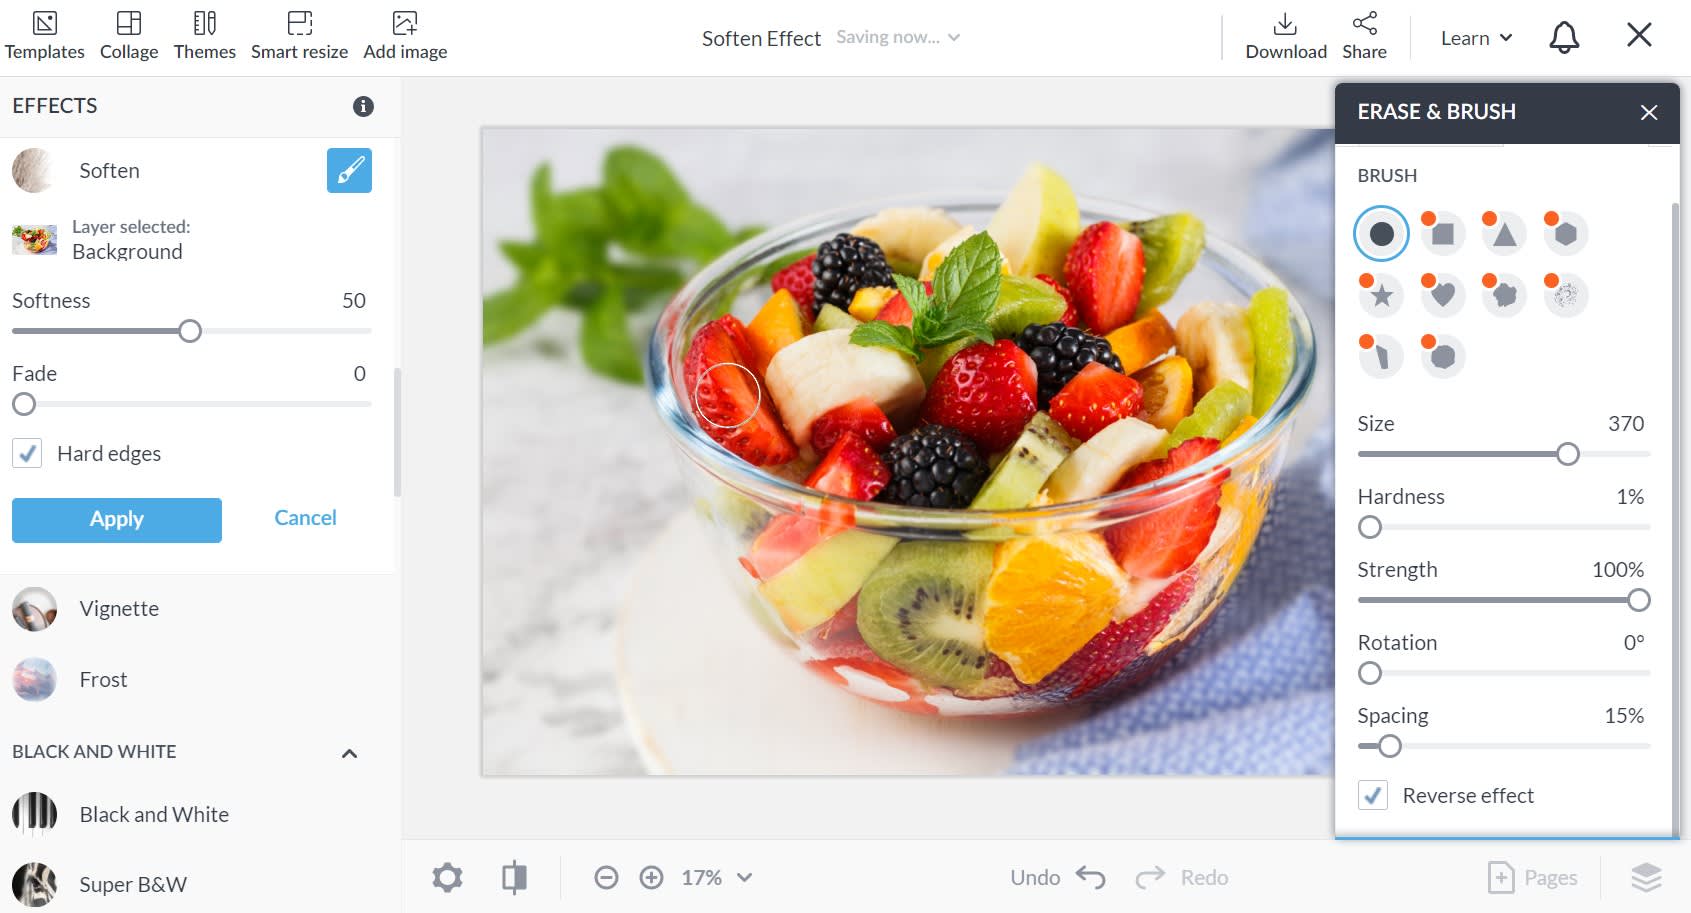
The Soften effect can be used to blur the area around your subject to emulate a 'shallow depth of field' in your image. Here are the steps to soften or blur the background.
How to use the Soften effect in PicMonkey

1. Open your image in PicMonkey, then find the Soften effect on the left tab column.
2. When applied, Soften will initially blur your entire image. (Note: You can apply Soften to various layers of a design; if editing a single image, then it's probably your only layer.)
3. Click the paintbrush icon at the top of the effect to open the Erase & Brush palette.
4. The paintbrush lets you paint on your desired blur; or, use the eraser to remove blur from the focal point of your image. A third option is to paint blur onto your focal point, then click Reverse effect.
5. When you're all done, click Apply to save your changes.

In our example, we've brushed blur onto the fruit bowl and reversed the effect.
About the sliders
There are several sliders you can use when adding or removing the Soften effect to your image.
From the Soften effect menu:
The Soften slider lets you control the amount of the effect that is added to your image.
The Fade slider controls the overall intensity of the effect.
Although not a slider, check the Hard edges box so that your blur is naturally clipped on the edges instead of maintaining a fuzzy look.
From the Erase & Brush palette:
The Size sider lets you adjust the size of your eraser or brush point.
Keep the Hardness slider low to make a natural transition from in focus to out of focus.
The Strength slider controls the intensity of your blur as it is erased or applied.
The Rotation and Spacing sliders control the angle of your eraser or brush point and the space between marks, respectively (keep spacing low for easy erasure or application of Soften).
Read more: 7 Photo Blur Effects to Edit Photos Into Works of Art